Unlock Homemade Delights: Your Beginner's Water Bath Canning Guide
Imagine a pantry stocked with vibrant, homemade jams, zesty pickles, and savory salsas, all preserved by your own hands. Water bath canning offers a satisfying and accessible entry point into the world of food preservation, transforming seasonal bounty into shelf-stable treasures. Far from being an intimidating process, it's a simple, scientific method that allows you to enjoy fresh flavors year-round, reduce food waste, and gain a rewarding sense of self-sufficiency. If you're eager to dive into home canning, you've come to the right place. This comprehensive guide will walk you through everything you need to know to start your water bath canning journey with confidence.
Water Bath Canning: Your High-Acid Food Ally (and Why pH Matters)
At its heart, water bath canning is a food preservation method specifically designed for high-acid foods. But what exactly does "high-acid" mean? It refers to foods with a pH level of 4.6 or lower. This acidity is critical because it inhibits the growth of harmful bacteria, yeasts, molds, and enzymes, including the dreaded *Clostridium botulinum*, which thrives in low-acid, oxygen-free environments.
How it Works:
A sealed jar of food is submerged in a large pot of boiling water and held at that temperature (212°F or 100°C) for a specific duration. This intense heat serves multiple purposes:
- It kills spoilage organisms present in the food.
- It expands the food and pushes out air from within the jar.
- As the jar cools, a vacuum seal forms, creating an anaerobic (oxygen-free) environment that prevents new spoilage.
This clever combination of acidity, heat, and vacuum sealing ensures your canned goods remain safe and delicious for extended periods without refrigeration. It's a testament to simple science providing powerful preservation!
Water Bath vs. Pressure Canning: A Crucial Distinction
Understanding the difference between water bath and pressure canning is paramount for safety.
- Water Bath Canning: ONLY for high-acid foods (pH 4.6 or lower). Think fruits, fruit spreads, pickles, tomatoes (with added acid), and salsas. The boiling point of water is sufficient to destroy spoilage organisms in these acidic environments. For a deeper dive into understanding acidity and preventing botulism, you might find our article on Safe Water Bath Canning: High-Acid Foods & Botulism Basics particularly helpful.
- Pressure Canning: REQUIRED for low-acid foods (pH above 4.6). This includes most vegetables (like green beans, corn, potatoes), meats, poultry, and soups. The risk of botulism is real with low-acid foods because *Clostridium botulinum* spores can survive boiling water temperatures. A pressure canner reaches much higher temperatures (240°F/116°C or above) using steam under pressure, which is necessary to neutralize these resilient spores.
Always follow a tested, reliable recipe from reputable sources (like university extension offices) as it will specify the correct canning method. Do not ever substitute water bath canning for pressure canning when a recipe calls for it.
Examples of High-Acid Foods Perfect for Water Bath Canning:
- Apples & Cranberries
- Blueberries, Blackberries & Plums
- Lemons & Sour Cherries
- Yellow Peaches & Pears
- Grapes & Most Berries
- Fruit Jams, Jellies & Preserves
- Pickles (Cucumber, Green Bean, etc., made with vinegar)
- Salsa (following tested recipes with added acid)
- Tomatoes (often require added lemon juice or citric acid to ensure safety)
Gather Your Gear: Essential Water Bath Canning Equipment
One of the best aspects of water bath canning is that it doesn't require a lot of specialized or expensive equipment. You might even have many of these items already in your kitchen!
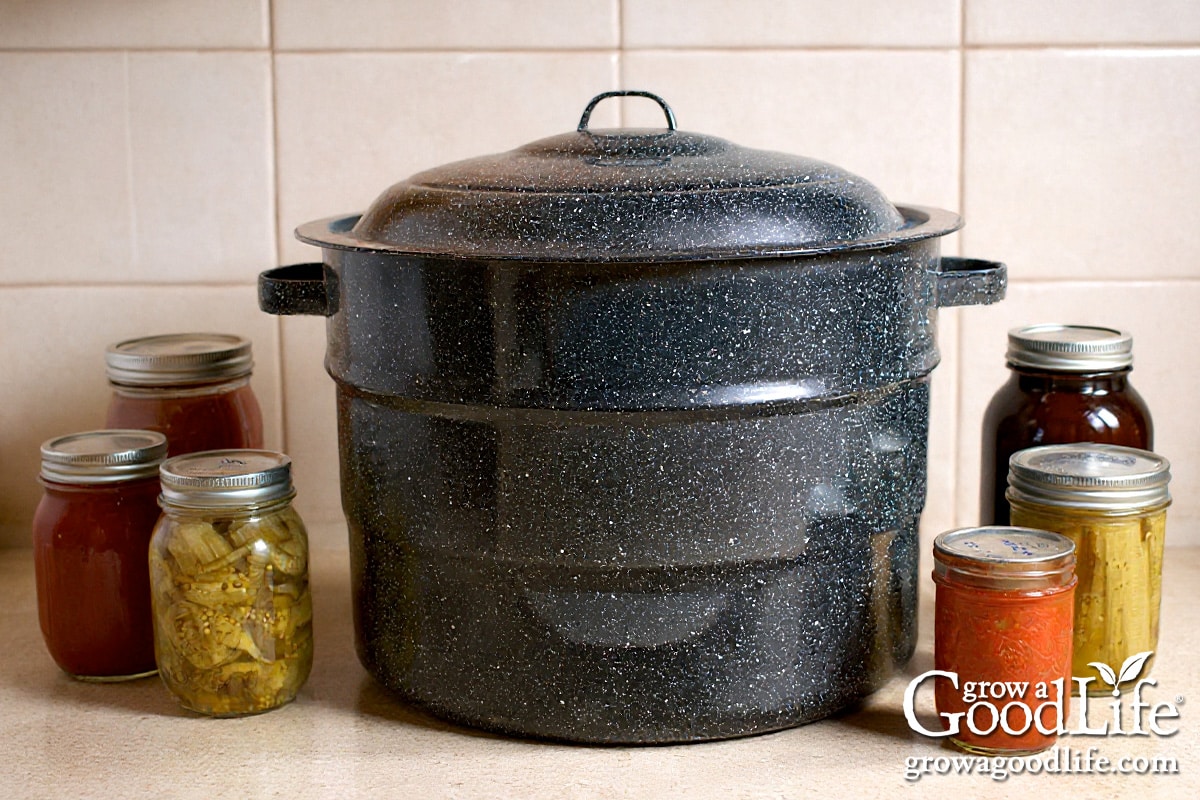
- Water Bath Canner with Rack: This is a large, deep pot (usually 21-quart capacity or more) specifically designed to hold multiple jars and allow water to circulate. It comes with a rack to keep jars off the bottom and prevent rattling. Tip: A very large stockpot (8 quarts or more) can often serve as a water bath canner if it's deep enough for jars to be covered by at least 1-2 inches of water, and you can improvise a rack (e.g., a cake cooling rack or canning rings tied together).
- Canning Jars: Use only tempered glass canning jars (Mason jars) specifically designed for canning. They come in various sizes (pint, quart, half-pint) and are durable enough to withstand high temperatures. Never use commercial food jars (like mayonnaise jars) as they are not designed for the heat and pressure of canning.
- Two-Piece Lids: These consist of a flat metal lid with a sealing compound and a metal screw band. The flat lids are for one-time use; the sealing compound degrades after processing. Screw bands can be reused indefinitely as long as they aren't rusty or bent.
- Jar Lifter: An absolute must-have! This specialized tool allows you to safely lift hot jars in and out of the canner without burning yourself.
- Canning Funnel: Helps keep jar rims clean when filling, which is crucial for a good seal.
- Headspace Tool/Ruler: Essential for measuring the correct amount of space between the food and the top of the jar (headspace), which is vital for proper sealing.
- Ladle: For easily transferring hot food into jars.
- Bubble Remover Tool/Non-Metallic Spatula: To remove air bubbles trapped in the food after filling the jars. A plastic chopstick works well too.
- Clean Cloths or Paper Towels: For wiping jar rims thoroughly before applying lids.
With these basic tools, you're well-equipped to embark on your canning adventure!
A Step-by-Step Guide to Water Bath Canning for Beginners
Now for the exciting part! This step-by-step guide to water bath canning for beginners will walk you through the entire process, ensuring you can preserve your homemade delights safely and effectively.
- Prepare Your Recipe and Jars:
- Choose a tested water bath canning recipe. Read it thoroughly before you begin.
- Wash your canning jars, lids, and screw bands in hot, soapy water. Rinse well.
- While sterilizing jars is no longer strictly necessary if processing for 10 minutes or more (the boiling water sterilizes them), many still warm their jars. Keep jars hot (e.g., in a dishwasher, hot water bath, or warm oven) to prevent thermal shock when adding hot food.
- Set aside new flat lids; do not boil them, but you can keep them in simmering water (180°F/82°C) if your recipe suggests to soften the sealing compound. Modern lids are designed to work without pre-heating, so check your lid manufacturer's instructions. Keep screw bands nearby.
- Prepare the Canner:
- Place the canning rack in the bottom of your water bath canner.
- Fill the canner with water; enough so that it will cover the jars by at least 1-2 inches once they are placed inside.
- Begin heating the water. If your recipe calls for hot food, bring the water to a simmer (180°F/82°C). If it calls for cold food, the water should be warm but not simmering.
- Fill the Jars with Food:
- Carefully ladle your hot prepared food into the hot jars using a canning funnel.
- Leave the precise amount of headspace specified in your recipe (typically ¼ inch for jams/jellies, ½ inch for fruits/pickles). Headspace is crucial for creating a proper vacuum seal.
- Use your bubble remover tool or a non-metallic spatula to remove any trapped air bubbles by gently running it around the inside of the jar. This ensures proper heat penetration and prevents food from boiling over. Adjust headspace if needed after de-bubbling.
- Clean Rims and Apply Lids:
- Wipe the jar rims thoroughly with a clean, damp cloth or paper towel to remove any food particles or grease. A clean rim is essential for a good seal.
- Center a flat, prepared lid on top of each jar.
- Screw on the band until it is "fingertip tight." This means tight enough to secure the lid, but not so tight that air cannot escape during processing. Overtightening can prevent proper sealing.
- Process the Jars:
- Using the jar lifter, carefully place the filled, lidded jars onto the rack in the simmering water bath canner. Ensure jars are not touching each other.
- Add more hot water if needed to ensure all jars are covered by 1-2 inches of water.
- Cover the canner with its lid.
- Bring the water to a full, rolling boil.
- Once a full boil is reached, start your timer for the processing time specified in your recipe. Adjust processing time for altitude if necessary (refer to reliable canning charts for your elevation).
- Maintain a steady, rolling boil throughout the entire processing time.
- Cool and Check Seals:
- Once the processing time is complete, turn off the heat and carefully remove the canner lid.
- Allow the jars to sit in the hot water for 5 minutes before removing them. This helps prevent "siphoning" (loss of liquid from the jars).
- Using your jar lifter, carefully remove the hot jars and place them upright on a towel or cooling rack on your counter. Ensure there is space between jars for air circulation.
- Let the jars cool undisturbed for 12-24 hours. As they cool, you'll hear satisfying "pops" as the lids seal.
- After cooling, check the seals. The center of the lid should be concave (curved inwards) and not flex when pressed. If you press the center and it springs back, the jar is not sealed.
- Store Your Canned Goods:
- For any unsealed jars, refrigerate them and consume the contents within a week or reprocess them immediately within 24 hours (with new lids), increasing the processing time slightly to account for the cooled contents.
- Remove the screw bands from sealed jars (they can trap moisture and cause rust). Wash the outside of the jars to remove any residue.
- Label your jars with the contents and date.
- Store in a cool, dark, dry place. Canned goods are best consumed within one year for optimal quality.
Congratulations! You've successfully completed your first water bath canning project. For more specific, detailed steps and common beginner questions, refer to our
Water Bath Canning for Beginners: Easy Step-by-Step Guide.
Mastering Your First Batch: Tips for Success & Safe Storage
Embarking on your canning journey is exciting, and with a few additional insights, you can ensure every batch is a success.
*
Always Use Tested Recipes: This cannot be stressed enough. Reputable sources like the National Center for Home Food Preservation (NCHFP), university extension offices, and well-known canning supply companies (e.g., Ball, Kerr) provide extensively tested recipes designed for safety. Avoid improvising or relying on old family recipes that haven't been scientifically tested for modern canning standards.
*
Accuracy is Key: Measure ingredients precisely, especially when it comes to acidifiers like lemon juice or vinegar in tomato or salsa recipes. Don't eyeball headspace; use a ruler.
*
Don't Rush the Cooling: Allowing jars to cool slowly and undisturbed is crucial for a strong seal. Resist the urge to press lids or tighten bands during this period.
*
What to Do with Unsealed Jars: If a jar doesn't seal, don't despair! You have a few options: refrigerate it and consume the contents within a few days, or reprocess it immediately (within 24 hours) using a new lid, ensuring the food is reheated to the appropriate temperature and adjusting the processing time as needed.
*
Proper Storage: Store sealed, labeled jars without their screw bands in a cool, dark, dry place. Humidity can corrode bands and lids, potentially compromising the seal. A good storage environment (like a pantry or basement) will help maintain quality for up to a year. Always inspect jars for signs of spoilage (bulging lids, mold, off-odors, or cloudy liquid) before consuming. When in doubt, throw it out!
Conclusion
Water bath canning is a wonderfully rewarding skill that connects you more deeply with your food and offers the joy of sharing homemade goodness. While it involves careful attention to detail and adherence to safety guidelines, the process itself is straightforward and easily mastered by beginners. By understanding the principles of acidity, following tested recipes, and using the right equipment, you can confidently unlock a world of homemade delights from your very own kitchen. So gather your ingredients, fire up your canner, and get ready to enjoy the freshest flavors all year long!